Không có tóm lược sửa đổi Thẻ: rte-source |
Không có tóm lược sửa đổi Thẻ: rte-source |
||
| Dòng 27: | Dòng 27: | ||
===Corpus=== |
===Corpus=== |
||
*[[Security Camera]] - Security Cameras trong kho sẽ kích hoạt phòng thủ khi phát hiện ra Người chơi( có thể bị phá hủy chúng mà không làm kích hoạt báo động). |
*[[Security Camera]] - Security Cameras trong kho sẽ kích hoạt phòng thủ khi phát hiện ra Người chơi( có thể bị phá hủy chúng mà không làm kích hoạt báo động). |
||
| − | *[[Laser Barrier]]s - Trúng phải mấy tia xanh xanh này trong kho sẽ kích hoạt hệ thống phòng thủ. Không như các tia Laser Barriers thường, chúng có nhiều cơ chế khác nhau đủ làm BỐI RỐI người chơi, chẳng hạn như tia laze di chuyển được , hay tia laze tắt mở theo chu |
+ | *[[Laser Barrier]]s - Trúng phải mấy tia xanh xanh này trong kho sẽ kích hoạt hệ thống phòng thủ. Không như các tia Laser Barriers thường, chúng có nhiều cơ chế khác nhau đủ làm BỐI RỐI người chơi, chẳng hạn như tia laze di chuyển được , hay tia laze tắt mở theo chu kỳ. Dù bạn đang tàng hình vẫn sẽ kích hoạt bào động, trừ khi đang bên trong [[Rift Plane]]. Ngoài ra, [[Ivara]] cũng có thể đi xuyên qua nếu sử dụng [[Infiltrate]]. |
===Grineer=== |
===Grineer=== |
||
Bản mới nhất lúc 11:21, ngày 24 tháng 11 năm 2016
 |
“Việc này tốn nhiều thời gian hơn ta dự kiến.” Trang này vẫn còn trong quá trình xây dựng và có thể không chính xác hoàn toàn. Xin hãy giúp đỡ hoàn thiện nó.
Drop tables need an update, "Defenses" also needs an update/weeding |
| Phiên bản cũ |
|---|
| Spy 1.0 trước Update 15.13 |

SPY hay nhiệm vụ do thám (ver 2.0) là dạng mission đòi hỏi người chơi phải đột nhập và giải nén các dữ liệu mật từ máy chủ của quân địch.
Các blueprints của Ivara Warframe cũng như các bộ phân cấu thành có thể được tìm thấy như phần thưởng tìm năng qua nhiệm vụ này ở tất cả các hành tinh , người chơi sẽ nhận đc các bản thảo khác nhau ở các phạm vi cấp độ khác nhau.
Cơ chế
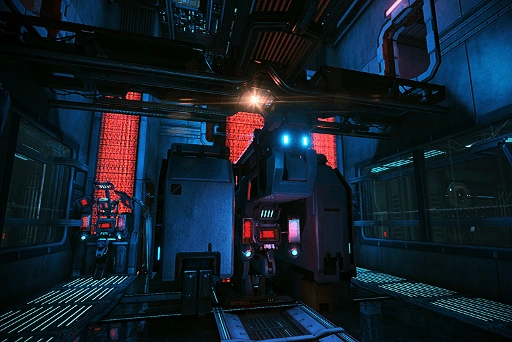
Corpus Data Vault on alarm.
Nhiệm vụ do thám yêu cầu người chơi đình vị vị trí của các Kho dữ liệu, đó là những căn phòng đặc biệt với hệ thống an ninh hạng nặng và cơ chế phòng vệ cấp cao bảo vệ các bản điều khiển chứa dữ liệu mật. Mỗi nhiệm vụ sẽ có 3 kho dữ liệu khác nhau, cả 3 kho dữ liệu đều phải bị xâm nhập và tấn công trước khi lối thoát hiểm trở nên khả dụng. Người chơi cần xâm nhập vào các phòng chứa dữ liệu và hack vào các bảng điểu khiến để đánh cấp thông tin . Nếu người chơi để hệ thống an ninh phát hiện, hay kẻ địch kích hoạt báo động trong kho dữ liệu, hệ thống phòng thủ cũng như cơ chế phòng vệ của kho được kích hoạt , đồng hồ đếm ngược xuất hiện và bắt đầu giảm dần cho đến khi dữ liệu bị xóa khỏi máy chủ, người chơi sẽ còn từ 20 đến 50 giấy( tùy thuộc vào độ khó) để xâm nhập và hack lấy dữ liệu trước khi thời gian đếm ngược về 0.
Tương tự như Rescue, nhiệm vụ này cũng có các lối đi ẩn và đường hầm mà người chơi có thể lợi dụng để vượt qua hệ thống phòng thủ của kho,cho phép người chơi hoàn thành nhiệm vụ một cách lén lút với không sự báo động nào. Một số biến thể, đặc biệt là trên Grineer Sealab và Grineer Forest tilesets cũng có những cách khác để đột nhập được vào kho chứa bằng cách kích hoạt các tính năng đặc trưng của bản đồ như hệ thống thông khí áp suất cao hay làm ngập cơ sở dữ liệu. Phần thưởng sẽ dựa trên số dữ liệu mà người chơi hack được, với ít nhất một dữ liệu mật phải được hack thành công để hoàn thành nhiệm vụ.
Biến thể
- Nhiệm vụ Spy Alert chỉ cần hack thành công được 1 kho dữ liệu để hoàn thành: nhiệm vụ bình thường cần 2 trong khi Corpus Merchant Ship Alerts cần cả 3 kho đều bị hack.
- Nhiệm vụ Spy Sortie luôn yêu cầu hack thành công cả 3 kho dữ liệu, nhưng không cho phép dùng đến Ciphers.
Phòng thủ
Một nhóm kẻ địch sẽ đi tuần tra quanh căn phòng, quân Corpus và Grineer có hệ thống phòng thủ khác nhau thiết lập xung quanh kho dữ liệu, tùy theo các biến thể khác nhau mà có hệ thống phòng thủ cũng thay đổi theo. Hệ thống sẽ kích hoạt báo động nếu phát hiện ra kẻ xâm nhập. Một số có thể bị vô hiệu hóa khi bảng điều khiển gần đó bị hack hoặc ngưng hoạt động.
Corpus
- Security Camera - Security Cameras trong kho sẽ kích hoạt phòng thủ khi phát hiện ra Người chơi( có thể bị phá hủy chúng mà không làm kích hoạt báo động).
- Laser Barriers - Trúng phải mấy tia xanh xanh này trong kho sẽ kích hoạt hệ thống phòng thủ. Không như các tia Laser Barriers thường, chúng có nhiều cơ chế khác nhau đủ làm BỐI RỐI người chơi, chẳng hạn như tia laze di chuyển được , hay tia laze tắt mở theo chu kỳ. Dù bạn đang tàng hình vẫn sẽ kích hoạt bào động, trừ khi đang bên trong Rift Plane. Ngoài ra, Ivara cũng có thể đi xuyên qua nếu sử dụng Infiltrate.
Grineer
- Sensor Bar - Thấy mấy cánh cửa có màn năng lượng màu vàng không? Bước ngang qua nó mà bạn sẽ ngay lập tức nhận damage
 Magneticvà đồng thời kích hoạt báo động của kho, nên đừng quên bắn mấy thanhSensor Bar trên cửa trước khi đi qua. Một số cửa ko có cái thanh này thì ko bị vô hiệu hóa được, trong khi số khác lại nhấp nháy theo chu kỳ( một số bạn chưa biết dễ dính cái này) nên phải quan sát thật cẩn thận.Tàng hình thì gặp cái vẫn không qua được.
 - Motion Detector - Some Grineer vaults have defenses involving scanners that sweep a yellow energy curtain across an area, triggering the alarm if the curtain is touched. In one vault, these scanners are pointed directly at the data storage console; these scanners have to be deactivated using other nearby consoles to ensure safe hacking.
- Sensor Regulator - These mobile Regulator variants patrol Data Vaults, and will trigger alarms if they spot a player or take damage and survive.
- Spark - A unique variant of the Bombard can appear as reinforcements if multiple Data Vault alarms have been tripped.
- Lynx - One particular vault layout for Grineer Spy missions has an idle Lynx suspended from the ceiling of the terminal room. Should the players trip the alarm the Lynx will activate and begin attacking nearby players and Grineer alike.
- If in a Crossfire Spy hybrid mission, this Lynx will also attack and be targetted by any nearby Corpus units.
Orokin
- Void Rifts - Orokin Moon missions feature distortions in space-time which can send Tenno back and forth in time between the vault's present state, and a period where the Data Vault was clean and pristine. Void rifts offer one-way passage through them, and in order to return to the previous state players must find another open void rift, or open up a closed void rift by attacking it. Several routes and puzzles require traveling between each time state to avoid obstacles or activate mechanisms leading to the console. Traveling through a rift dispels active Warframe abilities.
- Orokin Spectator - Similar to Sensor Regulators, these drones are mobile sentries that patrol the vault, and will trigger alarms if they spot the player, or take non-lethal damage.
- Laser Traps - Orokin Data Vaults have active laser traps that inflict Radiation damage and proc to any players they hit, along with raising the vault's alarm. Many laser traps are mounted on indestructible emitters, preventing players from simply destroying them. Those that can be destroyed can be safely disposed of without setting off the alarm.
Some Data Vaults may also feature security doors and pit traps that will engage and close upon alarms being triggered, which can impede a player's movement through the vault.
Whether a player succeeds or fails in retrieving the data inside the Data Vault, the vault itself will become easier to exit from: Corpus Data Vaults will have their laser defenses and any pit traps deactivated, while Grineer and Orokin Data Vaults can open alternate passages that lead to the exit.
Notes
- Upon successfully hacking a Data Vault without triggering an alarm or alerting enemies the affinity bonus is tripled.
- If all three Data Vaults have had their alarms triggered and data successfully retrieved, the objective will change into an Exterminate mission, where all remaining enemies must be killed before extraction. This change will not occur if only two or less vaults had their alarms triggered, or if two or fewer data consoles have been successfully hacked.
- Every Data Vault alarm tripped will cause subsequent vaults to implement enemy patrols with tougher enemies, or activate additional defensive systems.
- Data Vaults can randomly have variations on their alternate passages, where some passages may be impassable on a particular mission. Certain defenses may also be active in some missions while inactive in others.
- Failing or canceling hacks will set off the vault's alarm.
- With the exception of the server access panel, hackable consoles inside the vaults will be one difficulty easier than the rest of the level's consoles.
- Data Vaults are unaffected by external alarms, i.e. alarms initiated outside of them. Enemies inside Data Vaults will not be alerted even if a map-wide alarm has been initiated before the player has initiated the entrance hack. However, if the player has initiated the entrance hack and an enemy on the map raises the alarm after that, guards inside the vault will be alerted and may subsequently trigger the vault's alarm if the player doesn't dispose of them.
- Rare Storage Containers have a chance to spawn inside Data Vaults, and even the console terminal rooms.
- Syndicate Death Squads have a significant delay between the red flicker and their actual attack when the target is in a Data Vault, much longer than normal. This does not affect Field Bosses such as Stalker.
- If the Cryogenic Leakage hazard is active on a Spy mission, certain ice formations may block some of the alternate passages leading to the data console.
- Since the Grineer Settlement does not normally have Cryogenic Leakage, the ice will not reduce shields or affect the rest of the level, but will still block alternate passages. It seems Grineer Settlements have a higher likelihood of having this ice effect than other planets.
Missions
{{#arraydefine:planets| Mercury, Venus, Earth, Jupiter, Mars, Saturn, Sedna, Europa, Phobos, Uranus, Eris, Neptune, Ceres, Pluto }}{| border="0" cellpadding="0" cellspacing="0" class="wikitable sortable" style="float: left;width: 600px;" |- !Planet !Mission Name !Faction !data-sort-type="number"|Level {{#while:
 | {{#arrayindex:planets|0|}}
 | {{Database/{{#arrayindex:planets|0|}}}}

 {{#while:
   | {{#arraysearch: {{#arrayindex:planets|0|}} |Spy|0 }}
   |
     |-
     | [[{{#arrayindex:planets|0|}}|{{#arrayindex:planets|0|}}]]
     | {{#arrayindex:{{#arrayindex:planets|0|}}|Lỗi biểu thức: Dấu phân cách “{” không rõ ràng|}}
     | [[{{#arrayindex:{{#arrayindex:planets|0|}}|Lỗi biểu thức: Dấu phân cách “{” không rõ ràng|}}]]
     | {{#arrayindex:{{#arrayindex:planets|0|}}|Lỗi biểu thức: Dấu phân cách “{” không rõ ràng|}}


 }}
}} |+There are a total of 1 Spy missions.
|}
Rewards
Each Data Vault will reward from 1,000 to 4,000 Affinity for a successful hack (based on the tier of the mission you are on), which will be tripled if completed without triggering the alarms. The Affinity earned is dependent on the complexity of the Vault, and corresponds with enemy level.
Spy missions can reward the following items upon successful completion. Each Vault hacked will reward one item, regardless if done stealthily or not.
- Arrow Mutation
- Blunderbuss
- Continuity
- Covert Lethality
- Credit Cache
- Cryo Rounds
- Deep Freeze
- Fast Deflection
- Fast Hands
- Frigid Blast
- Frostbite
- Fury
- Fusion Cores (All rarities)
- Heavy Impact
- Hell's Chamber
- High Noon
- Hornet Strike
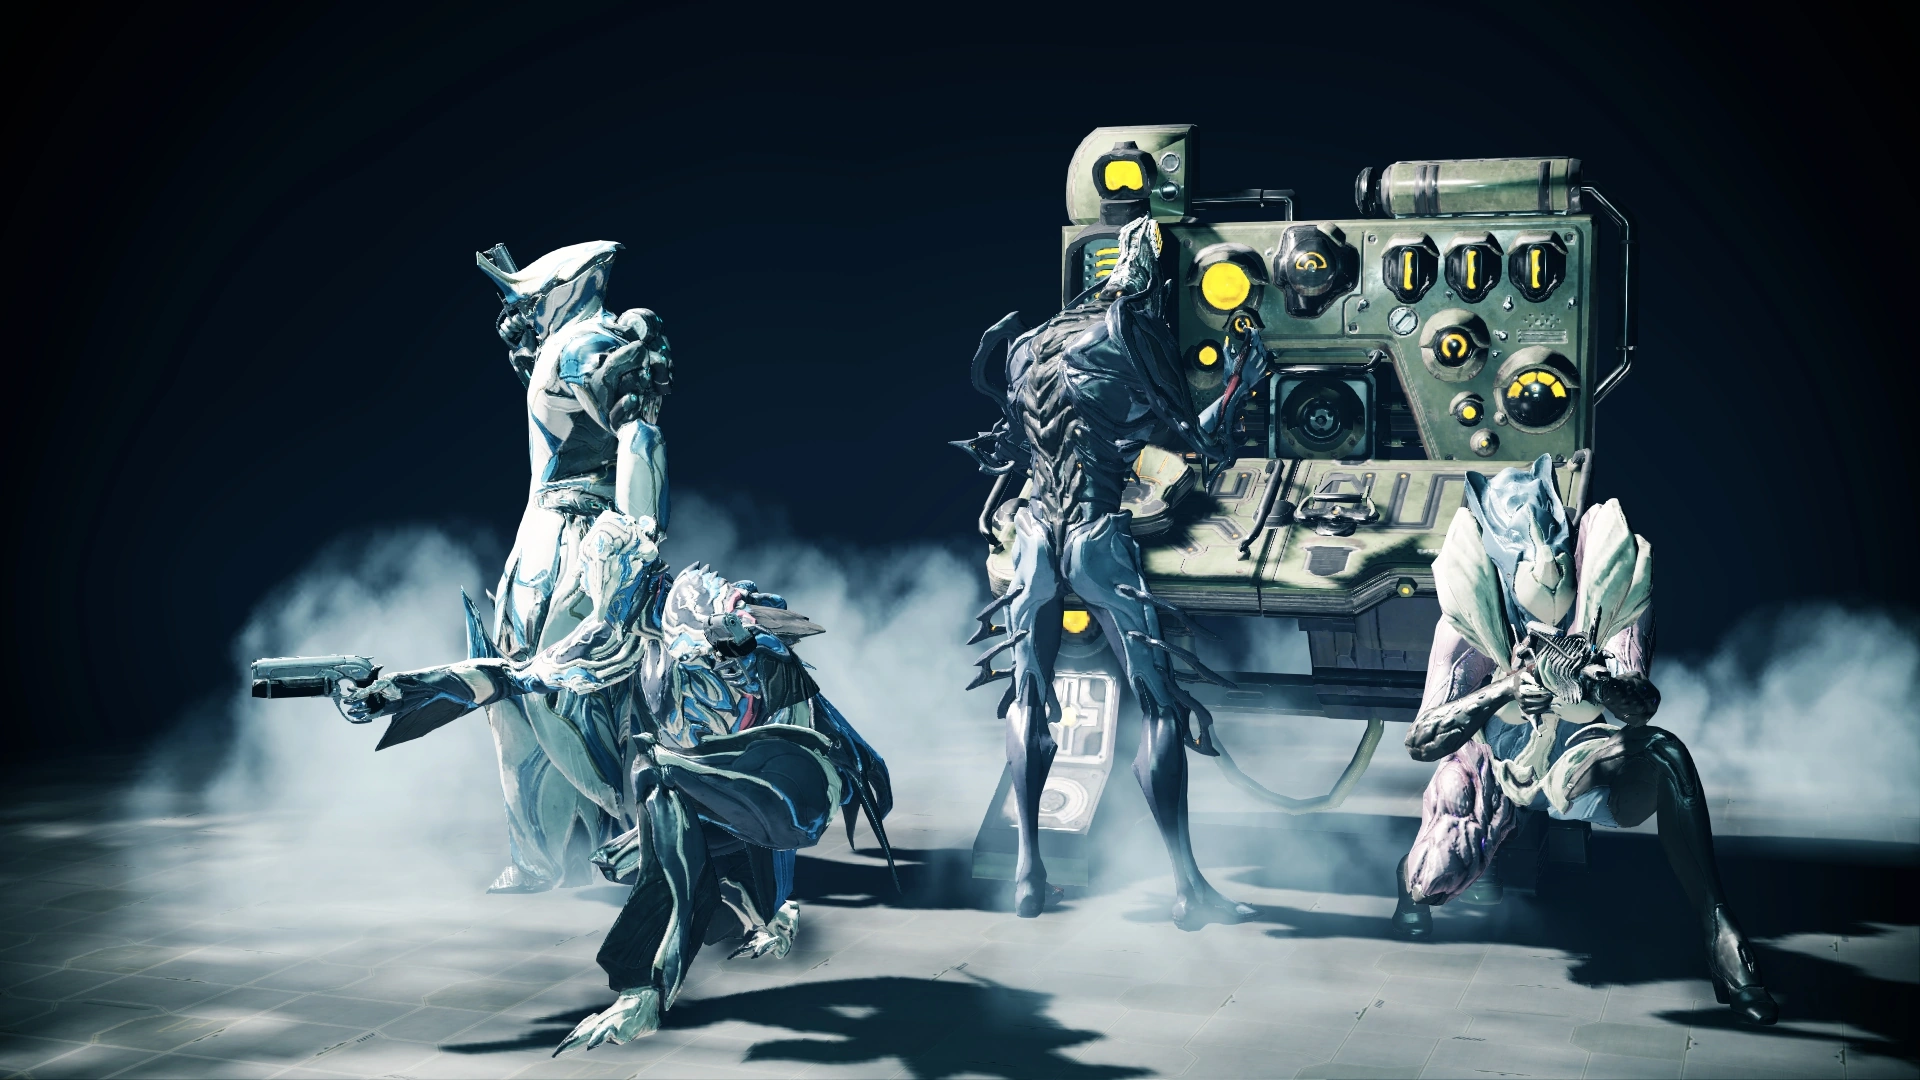
- Ivara Component Blueprints
- Magazine Warp
- Metal Auger
- No Return
- North Wind
- Parry
- Piercing Hit
- Pistol Ammo Mutation
- Pistol Gambit
- Point Blank
- Point Strike
- Power Throw
- Pressure Point
- Reflection
- Reflex Coil
- Reflex Guard
- Rifle Ammo Mutation
- Rime Rounds
- Rush
- Scattering Inferno
- Scorch
- Serration
- Shotgun Ammo Mutation
- Sniper Ammo Mutation
- Speed Trigger
- Stabilizer
- Steady Hands
- Stormbringer
- Streamline
- Stretch
- Target Cracker
- Thermite Rounds
- Trick Mag
- Void Relics
- Vicious Frost
- Vitality
- Volcanic Edge
| Tier | Reward | Planet | Node | Level | Faction | Tileset |
|---|---|---|---|---|---|---|
| Tier 1 Levels 1-15 |
Ivara Systems Vicious Frost Volcanic Edge | |||||
| Earth | Cambria | 2-4 | ||||
| Venus | Unda | 4-6 | ||||
| Mercury | Suisei | 8-10 | ||||
| Mars | Arval | 9-11 | ||||
| Phobos | Shklovsky | 11-13 | ||||
| Ceres | Bode | 12-14 | ||||
| Tier 2 Levels 16-25 |
Ivara Chassis Rime Rounds Scattering Inferno | |||||
| Jupiter | Amalthea | 17-19 | ||||
| Europa | Valac | 18-20 | ||||
| Saturn | Dione | 21-23 | ||||
| Lua | Pavlov | 25-30 | ||||
| Tier 3 Levels 26+ |
Ivara Neuroptics Ivara Blueprint Covert Lethality Frigid Blast Frostbite Thermite Rounds Scorch | |||||
| Uranus | Rosalind | 27-29 | ||||
| Neptune | Laomedeia | 30-32 | ||||
| Sedna | Kappa | 30-34 | ||||
| Kuva Fortress | Pago | 31-33 | ||||
| Pluto | Oceanum | 32-36 | ||||
| Tier | Reward | Planet | Node | Faction | Tile Set |
|---|---|---|---|---|---|
| Tier 1 Level 1-15 |
Ivara Systems Vicious Frost Volcanic Edge | ||||
| Earth | Cambria | ||||
| Jupiter | Adrastea | ||||
| Mars | Martialis | ||||
| Mercury | Suisei | ||||
| Saturn | Titan | ||||
| Venus | Unda | ||||
| Venus | Vesper | ||||
| Tier 2 Level 16-25 |
Ivara Chassis Rime Rounds Scattering Inferno | ||||
| Earth | Pavlov | ||||
| Europa | Armaros | ||||
| Europa | Valac | ||||
| Phobos | Grildrig | ||||
| Phobos | Shklovsky | ||||
| Saturn | Aegaeon | ||||
| Sedna | Scylla | ||||
| Sedna | Tikoloshe | ||||
| Uranus | Rosalind | ||||
| Uranus | Umbriel | ||||
| Tier 3 Level 26+ |
Ivara Helmet Ivara Blueprint Covert Lethality Frigid Blast Frostbite Thermite Rounds Scorch | ||||
| Ceres | Hapke | ||||
| Ceres | Lex | ||||
| Eris | Cyath | ||||
| Eris | Gnathos | ||||
| Neptune | Laomedeia | ||||
| Neptune | Sao | ||||
| Pluto | Oceanum | ||||
- Astral Twilight
- Blood Rush
- Catalyzer Link
- Cleaving Whirlwind
- Coiling Viper
- Crushing Ruin
- Cryo Rounds
- Deep Freeze
- Fast Hands
- Focused Defense
- Gnashing Payara
- Hell's Chamber
- High Noon
- Hornet Strike
- Hydraulic Crosshairs
- Ivara Chassis Blueprint
- No Return
- North Wind
- Piercing Hit
- Pistol Gambit
- Point Strike
- Reflex Coil
- Rime Rounds
- Scattering Inferno
- Serration
- Shocking Touch
- Shrapnel Shot
- Stormbringer
- Streamline
- Target Cracker
- Void Relics
Tips
- If there is a general alarm as you traverse the level, wait until you arrive at a vault to disable it. Any previously alerted enemies won't reactivate the alarm unless they were already in the process of doing so.
- When you enter a vault, the alertness levels of most enemies outside it will drop, and they will not follow you in (though they may patrol through the now unlocked doors.) It is advisable to wait a moment in the vault's antechamber in case you unknowingly encounter one of the exceptions. Exceptions include:
- Drahk
- Drahk Masters
- Rollers
- Latchers
- Melee units (e.g. Scorpions, Butchers, Prod Crewmen, etc.)
- Shockwave MOAs
- Any Infested
- Timing in the vaults is based on when you begin to hack the door. If you take longer on your hack, enemies will have progressed along their patrol routes.
- It is possible to trigger the alarms inside the vault by attempting to hack the entrance console while sliding. The same is true of consoles inside the vault, because sliding away will force the hack to cancel.
- On Grineer or Orokin Spy missions, be careful when triggering your Syndicate weapon effects. If it unexpectedly occurs when you are in a vault, it is likely to trigger Sensor Regulators or Orokin Spectators across the entire vault, as the proc damage may not be enough to kill them. Consider temporarily switching to a weapon without one, especially if your squad is doing multiple vaults simultaneously (the Affinity earned from a completed vault is instant and enough to fill up an empty effect meter).
- Companions do not trigger traps, allowing free usage inside Data Vaults. However, they can still trigger the alarms if they attack enemies.
- Various Frames can use their powers to assist in completing vaults faster:
- Limbo can make various parts of both Corpus and Grineer spy vaults trivial, as being in the Rift Plane allows you to walk through laser barriers and energy doors without triggering an alarm. Cataclysm can be used to destroy cameras on the other sides of walls. Banish is silent, allowing silent kills on vault guards from within the Rift Plane.
- Loki can use Decoy and then Switch Teleport to bypass barriers and obstacles.
- However, Decoy appears to be able to trigger Grineer Sensor Bars if it passes through them, ie. when placed on the conveyor belt.
- Loki can also use the cloaking ability to evade guards sight, however beams will still be set off if you pass through them.
- Similarly, Ash can use his Shuriken ability to destroy Security Cameras and kill guards silently, while using Teleport to bypass barriers and obstacles and Smoke Screen to hide from view, although beams will still be set off if Ash passes through them.
- Valkyr can use Rip Line to quickly navigate obstacles, as well as silently destroy Security Cameras.
- Mirage's Sleight Of Hand can be used to disable Cameras in Corpus vaults. This will also affect consoles however (on both Corpus and Grineer maps), prompting enemies to try and raise the alarm, which may be an intended effect, as the resulting explosion may kill the guard, or at least prevent them to use the console until Sleight of Hand expires. Note that Sleight of Hand does NOT affect laser barriers in Corpus vaults. It also seems that activating Sleight of Hand too close to a Sensor Regulator can cause it to trigger the alarm.
- A Nova using Worm Hole can also easily bypass parts of various vaults, especially Corpus ones, as going through Worm Holes does not trigger Laser Barriers or Sensor Bars.
- An Equinox in Night Aspect using Rest can put Sensor Regulators to sleep, allowing for easy evasion during the duration of the ability.
- Wukong can use his Cloud Walker to easily traverse unseen, although he will still set off alarms if you make contact with Laser Barriers.
- Ivara's Sleep and Noise arrows are all of great help. Sleep arrows put enemies to sleep for few seconds, Noise arrows will attract enemies to the arrow's location without alerting them.
- Ivara's cloaking ability, Prowl, allows her to move around unseen, but lasers will still trip the alarms if touched. With the Augment Infiltrate, however, Ivara can prowl right through security lasers without triggering alarms.
- Ivara's Dashwire arrow can help navigate certain laser-based traps that would otherwise require accurate jumps and acrobatics.
- If you don't mind setting off alarms, just stock up on Ciphers, bring a frame with immunity to knockdown like Atlas, Rhino or Valkyr and simply smash-and-grab your way through.
- If you are having trouble solving advanced Corpus consoles, try this user guide.
- While Spy Sorties prevent Ciphers from being used to accomplish hacking, Air Support Charges are still allowed, which means that the Liset's Air Support Override still works. That said, though, be aware that Air Support still has a 10-minute cooldown timer between-uses, so if you wish to have the "safeguard" of being able to activate an Air Support at each of the 3 vaults in a Sortie, it would be wise to plan-ahead and set aside at least 30 minutes to run that mission.
Trivia
- Oddly, the Spy 2.0 Codex entry still shows the previous Grineer Spy 1.0 terminal, although it has been completely discarded from the game.
- The Grineer vault with Lynx is roughly identical to the room that was only available in Grineer Spy 1.0 missions.
- Before Spy 2.0 was added, the room used to contain a Jackal instead of Lynx. The Jackal however, served no purpose and could not be activated.
Bugs
- Neptune Laomedeia has a bug which does not unlock the last door before the extraction point, so even with all 3 data packs the mission cannot be completed.[citation needed]
- Spy missions sometimes fail even if no data is lost.[citation needed]
- Occasionally hitting a barrier directly outside the vault will trip the alarm.[citation needed]
- Occasionally, in the Grineer "conveyor belt" vault, the visual effect for the blast effect walls will not render. They still behave normally. Their location can be identified by the frame in place where it normally is, with a yellow tint to it.[citation needed]
- In solo mode, triggering the alarm, then dying and using revive will freeze the timer, giving unlimited time to hack the console.[citation needed]
- It is possible to trigger a data deletion alarm even after the data is extracted. This causes the timer to continue counting down, and leads to mission failure.[citation needed]
- Occasionally, in Corpus/Infested spy vaults with the walls of lasers that flash on and off, an opening that does not appear to have a laser grid will still cause knockdown and trigger the alarm when passed through.[citation needed]
- It will still be on/off in line with the other flashing laser walls, so those can be used to predict when to go.
Media
")
")
")
")
")
")
")
")
")
")
")
")
")
")
")
")
")
")
| Missions | |||
|---|---|---|---|
| PvE | Assassination • Capture • Crossfire • Deception • Defense • Excavation • Exterminate • Hijack • Interception • Mobile Defense • Recovery • Rescue • Sabotage (Hive, Orokin, Reactor, Sealab) • Spy • Survival • Trial | ||
| PvP | Duel • Solar Rail Conflict Cephalon Capture • Annihilation • Team Annihilation | ||
| Alert • Hazards • Invasion • Nightmare Mode • Quest • Sortie • Tile Sets | |||